


The Abbie Crochet Cardigan – Easy Free Cocoon Cardigan Pattern

Looking for an easy free crochet cardigan pattern that makes creating your first handmade garment feel achievable? The Abbie Cocoon Cardigan combines simple construction with beautiful texture and comes in four adult sizes covering Small to 5XL.
Made with #4 weight (aran) yarn and basic crochet stitches, this beginner-friendly cocoon cardigan is a wonderfully wearable project without complicated shaping or intimidating garment construction.
There is something rather special about crocheting your first garment. You start with yarn and a hook, work what looks suspiciously like a large rectangle for quite some time… and then suddenly you are wearing it!
If you have been wanting to try a crochet cardigan but have been putting it off because garments seem complicated, the Abbie Cocoon Cardigan could be exactly the pattern you have been waiting for.
Cocoon cardigans are one of my favourite styles of crochet garment for beginners. Their simple construction means you can concentrate on your stitches and getting comfortable with garment making without worrying about lots of shaping, separate panels or complicated assembly.
And, of course, I couldn’t resist giving this one some gorgeous texture!
The Abbie Crochet Cardigan uses the same stitch combination as the other patterns in my Abbie Collection, creating a beautiful textured fabric from basic crochet stitches.
So, grab your yarn, find your hook and let’s make a cardigan!
The Inspiration Behind the Abbie Crochet Cardigan
If you have been following Sunflower Cottage Crochet for a while, the name Abbie may already be familiar to you.
The Abbie Collection is named after my niece, and I have been gradually adding designs to it using the same stitch combination.
One of the existing designs is my Abbie Tee, a lovely crochet top that uses this same texture. If you have already made the tee, the stitch pattern in this cardigan will feel very familiar.
You can find the Abbie Tee here:
The Abbie Tee – A Quick Summer Make

And the collection is still growing because I am currently working on the Abbie Blanket too!
I love creating collections like this because they demonstrate just how versatile a good crochet stitch combination can be. Change the yarn, dimensions or construction and suddenly those same familiar stitches can become something completely different.
One of my favourite features of this crochet cardigan pattern is the texture.
The Abbie uses the same stitch combination that you will find throughout the Abbie Collection. It takes familiar crochet stitches and combines them in a way that creates much more visual interest than you might expect.
It is a lovely example of why you don’t necessarily need advanced crochet techniques to create beautiful fabric.
Once you understand the repeat, you can settle into the rhythm of the pattern and watch that gorgeous texture grow.
The result is a comfortable, textured layering piece that looks far more complicated than it actually is.
And those are some of my favourite designs to make!
Simple Cocoon Cardigan Construction – Perfect for Your First Crochet Garment
Have you ever looked at a beautiful crochet sweater or cardigan and thought:
I’d love to make one… but I’m not sure I’m ready for that yet.
A cocoon cardigan is a fabulous place to start.
Traditional crochet cardigans can involve several pieces, careful shaping, shoulder seams, sleeves, necklines and rather a lot of measuring. None of those things are necessarily difficult once you know how, but tackling them all at once can make your first garment feel a little daunting.
The Abbie Crochet Cardigan takes a much simpler approach.


The main body is essentially crocheted as a large rectangle using the Abbie stitch combination. Once you have reached the measurements required for your chosen size, the rectangle is folded and seamed to create the characteristic cocoon shape and armholes.
Then you add the ribbing and trim around the cardigan and sleeves to bring it all together into a finished, put together piece.
That’s it.
No complicated neckline shaping and no separate fronts and back to crochet. No trying to remember which direction your left shoulder decrease is supposed to be going while simultaneously wondering why you ever thought making clothes was a good idea!
Instead, you can settle into the stitch repeat and enjoy watching the fabric grow.
The relaxed shape is also more forgiving than a closely fitted sweater, which makes this style particularly good for your first crochet garment. You will still practise important skills such as checking gauge, reading garment measurements, choosing a size, seaming and finishing – but you can learn them using a much simpler construction.
A little tip before you seam
When you have finished your rectangle, lay it out and check the measurements before assembling your cardigan.
I also recommend using stitch markers to temporarily hold the folded sections together before you seam. This gives you an opportunity to check that everything is positioned correctly and that you are happy with the armhole openings.
It is one of my favourite parts of making a cocoon cardigan because that large rectangle suddenly transforms into something recognisably wearable.
If you’ve been telling yourself that you’re “not ready” to crochet a cardigan yet, this might just be the project that proves otherwise.
Abbie Crochet Cardigan Pattern Information
Before we get our hooks moving, let’s look at the important details you’ll need to make your Abbie.
Skill Level
Beginner / Easy
This pattern is designed for crocheters who have a basic understanding of the basic crochet stitches and are comfortable following a written crochet pattern.
You don’t need previous garment-making experience.
Sizes and Measurements
The Abbie Cocoon Cardigan is written in four adult sizes covering Small through 5XL:
| Size | Bust | Approx. yardage |
| S/M | 30-38” | 1100 |
| L/XL | 40-46” | 1200 |
| 2X/3X | 48-54” | 1400 |
| 4X/5X | 56-62” | 1600 |
Cocoon cardigans are designed to have a relaxed fit, so take a few minutes to look at the finished measurements before choosing your size rather than automatically making the same size you usually buy in clothing.
Think about how you would like your cardigan to fit, too. Would you prefer something wonderfully relaxed and oversized or a slightly neater fit?
Five minutes with your tape measure now can save an awful lot of frogging later!
Yarn
The Abbie Crochet Cardigan is designed using #4 weight yarn, also commonly known as aran weight yarn in the UK and worsted weight yarn in the US.
Yarn used: I used Paintbox Simply Aran in cream.
Fibre content: 100% acrylic
Ball/skein size: 201 yards per 100g
Yarn Requirements
See the chart above for yardage requirements.
You can substitute another #4 weight yarn, but remember that the number printed on the yarn label doesn’t tell you everything.
Fibre content, yarn thickness, twist and construction can all affect the drape and finished size of your cardigan.
Hook
5 mm (H) crochet hook, or hook size needed to obtain gauge.
Other Materials
You will also need:
- Scissors
- Tapestry needle
- Stitch markers (I would recommend 4)
- Tape measure
Gauge
8 sts per 2”. Height is not important.
Due to the style of this cardigan, if you are slightly wider that gauge for 8 sts that is ok – just be sure to do a quick calculation and make sure it isn’t going to be too wide (more than 3-4”) for you or it will fall off your shoulders!
I know. Making a gauge swatch isn’t nearly as exciting as diving straight into your new cardigan.
Gauge matters much more when you are making something that needs to fit a human than it does when you are making something like a scarf.
Even a small difference in your stitch or row gauge can become quite significant when it is repeated across the width or length of an entire garment.
If your stitches are too small, try going up a hook size. If they are too large, try going down.
Your future cardigan-wearing self will thank you.
Skills You’ll Need
To make the Abbie Crochet Cardigan you should be comfortable with:
- Chaining
- Slip stitch
- Single crochet
- Double crochet
- Front post and back post stitches (I have tutorials for these below!)
- Working into stitches and/or chain spaces
- Repeating a stitch pattern across a row
- Turning your work
- Counting stitches and rows
- Basic seaming
- Fastening off and weaving in ends
If there is one technique on that list that you haven’t tried before, please don’t let it put you off.
Every crochet technique you can confidently work today was once something you didn’t know how to do.
Take it one row at a time.
Customising Your Abbie Cocoon Cardigan
One of the advantages of simple crochet cardigan construction is that there is often room to make the finished garment feel more like you.
Here are a few ideas to consider.
Play With Colour
A neutral shade will give you a versatile cardigan that works with lots of outfits, but there is absolutely no rule saying handmade garments need to be beige!
Try a rich autumnal shade, a jewel tone, your favourite bright colour or simply the colour that makes you happy every time you see it.
Add Stripes or Colour Blocks
The repeating stitch pattern gives you plenty of opportunity to experiment with colour.
You could create regular stripes, use broader blocks of colour or use contrasting yarn for the edging.
Just remember that changing colours means more ends.
There is always a catch.
Adjust the Length
If you add extra length or width, remember to allow for additional yarn. But be careful with this – you don;t want to make your rectangle so big that it falls off your shoulders! As noted above I would not increase it by more than 3-4″.
Make the Finishing Your Own
If you have a favourite edging stitch combination for the trim and arms feel free to use it instead of my front and back post option. You could also add a button and button hole to your trim. Or why not add a pocket or two? There are so many ways you can adjust this pattern with the way you finish it.
When customising any crochet garment, keep in mind that changing the dimensions may affect the overall fit and yarn requirements.
This Pattern Featured in:
The Abbie Cocoon Cardigan is also one of the featured patterns in the Fall Into Crochet 2026 event hosted by Itchin’ for Some Stitchin’!
The Abbie Crochet Cardigan will remain free to view right here on the Sunflower Cottage Crochet blog, so you can still make your own whenever you are ready.
Prefer an Ad-Free Printable PDF?
The complete Abbie Cocoon Cardigan crochet pattern is available free on the blog below.
However, if you prefer to print your patterns, make notes on them or crochet without needing to stay online, you can also purchase the ad-free PDF version.
Buy the Abbie Crochet Cardigan PDF



Purchasing the PDF is also a lovely way to support Sunflower Cottage Crochet and helps me continue creating free crochet patterns and tutorials for you here on the blog.
Thank you!
Abbie Cocoon Cardigan Free Crochet Pattern
** This is a free pattern on the Sunflower Cottage Crochet blog. If you are reading this anywhere else it is stolen content. Please do not copy and paste any part of it or print this pattern out. Please bookmark this page and use the website to work up your pattern. This helps my small business greatly as it provides a little bit of ad revenue which will in turn will allow me to continue to create free content for you!**
Abbreviations
- Ch(s)–chain(s)
- St(s)–stitch(es)
- Ss – slip stitch
- rep–repeat
- sk—skip
- fsc – foundation single crochet
- dc–double crochet
- FPDC – front post double crochet
- BPDC – back post double crochet
- YO—yarn over
- FO—fasten off
- RS / WS – Right side / Wrong side
Pattern Notes
Written in US terms.
Turning ch stitches at the beginning of a row do not count as a st.
All ch sts after the turning ch count as a st.
Your stitch count will remain the same as per row 1 for your panels.
If you cannot get gauge for this project you will need to ensure that your starting row is in multiple of 4+1 (so that it measures 38’’ (43’’/48’’/53’’).
Similarily with the height of your panel, it is fine for it to be a little bigger. So if you find that you are under on the height add another repeat or two before assembling the cardigan. Better to have a longer cardigan than a shorter one!
Hint: If you like your cardigans to be a roomier (especially if you are on the larger end of a bust size) try making a size up!
Special Stitches:
Foundation single crochet: You can find a good tutorial on this here https://www.youtube.com/watch?v=elIXgLBiCU0
I find this has a more aesthetically pleasing finish than the chain starts to projects.
Blossom Stitch : I have video tutorials on how to work this stitch combination. This is the stitch combination used to create the main panel. You can find my video tutorial for this one at:
Right handed – https://youtu.be/ZnZ8_1QbYZY?si=a5bwFCu9DdNonZyY
Left handed – https://youtu.be/BQDu1t-KAvQ?si=gQYAjj4EecPAGml7
Back post:
To work a bpdc you work a dc, but instead of inserting your hook into the next stitch through the front and back loops, you insert your hook around the post of the stitch below from the back to the front and then out of the back again.
You can see this in my bpdc video
Right handed video tutorial – https://www.youtube.com/watch?v=hTPKAPQblkE

Front post:
To work a fpdc you work a dc, but instead of inserting your hook into the next stitch you insert your hook around the post of the stitch below from the front to the back and then out of the front again.
You can see this in my fpdc video
Right handed – https://www.youtube.com/watch?v=nmWe76Y4v08
Left handed – https://www.youtube.com/watch?v=biHxNSKo5Vw&t=2s

The Pattern
Row 1 – Fsc 153 (173, 193, 213)
OR
Ch 154 (174, 194, 214) DC in 2nd ch from hook and each ch across. Turn.
(153, 173, 193, 213)
Row 2 – Turn, CH1, SC in first st, sk1 st, *[DC, CH1, DC] in next st, SK1, SC in next st*. Repeat from * to * across. (Note: you will end with a SC in the final st)
Row 3 – Turn, CH4 (counts as a DC and CH1), *SK the next DC from the previous row, SC in the CH1 space, CH1, DC in next SC, CH1*. Repeat from * to * across.
Row 4 – Turn, CH1, SC in first st, *sk the CH1 sp, [DC, CH1, DC] in top of sc from previous row, sk the CH1 sp, SC in top of next DC from previous row.
Rep from * across.
Rows 5 on Rep rows 3 and 4 until your panel is 38 (39, 40, 40)” tall (or as tall as desired.
FO and weave in ends
Assembly
Step 1: To assemble your cardigan, fold it in half so that the foundation row (or chain row) and the last row you worked are together at the bottom with right sides facing.
Step 2: From the top mark your armholes. You will need to measure down 6’’ (7’’/8’’/8.5’’) as per the figure photo below. (Note the fig photo is for my Highland Neamh Cocoon Cardigan but you can see how the rows line up better on this photo)
Do this on both sides.

Step 3: Whip stitch from the bottom edge (remember, this is where your foundation row and last row worked meet) up to your stitch marker.
FO and weave in ends.
Repeat this step for the other side
Ribbing around your cardigan
Open out your cardigan and turn it the right way out so that the RS is on the outside. You can decide which side you prefer to be the right side, although your Abbie Cocoon Cardigan will be reversible when completed!
Round 1: With RS facing, attach your yarn to any stitch around the bottom of your cardigan.
DC in each st around making sure that you have an even number of stitches when you have finished. SS to join Do not turn.
Round 2: ch1, FPDC around the first st, BPDC around the next, *FPDC around the next st, BPDC around the next st.* Rep from * to * around. You will end with a BPDC. SS to join. Do not turn.
Rounds 3-5 (6/7/8): Ch1, *FPDC around the FPDC from the previous round, BPDC around the BPDC from the previous round* Rep from * to * around. SS to join. Do not turn.
FO and sew in ends.
Ribbing around your sleeves: (repeat for both sleeves)
Round 1: With RS facing, attach your yarn to any stitch around the bottom of your sleeve
DC evenly around making sure that you have an even number of stitches when you have finished. SS to join Do not turn.
Hint: if your round of DC starts to look wavy you have too many sts and need to space them out a little more. If the arm hole looks tighter you need to add more sts.
Round 2: Ch1, FPDC around the first st, BPDC around the next, *FPDC around the next st, BPDC around the next st.* Rep from * to * around. You will end with a BPDC. SS to join. Do not turn.
Rounds 3-3 (3/4/4) : Ch1, *FPDC around the FPDC from the previous round, BPDC around the BPDC from the previous round* Rep from * to * around. SS to join. Do not turn.
FO and sew in ends.
Love Cocoon Cardigans? Try These Free Crochet Patterns Too
If you enjoyed making the Abbie, you might be pleased to know that it isn’t my only free crochet cocoon cardigan pattern! Cocoon cardigans are wonderfully comfortable to wear, and their simple construction makes them a great way to experiment with different crochet stitches and textures without adding lots of complicated garment shaping.
Highland Neamh Cocoon Cardigan
For something a little chunkier, try my Highland Neamh Cocoon Cardigan. This design uses #5 weight yarn and a gorgeous textured stitch combination featuring crossed double crochets. The free pattern includes four adult sizes, and you can make the cardigan with simple short sleeves, while the PDF also includes additional sleeve options if you’d like to customise your version.
Highland Neamh Cocoon Cardigan – Free Crochet Pattern
Elegant Cocoon Cardigan
If you’re looking for a lighter easy crochet cardigan pattern, the Elegant Cocoon Cardigan is another lovely option. It uses #3 weight yarn and the wonderfully named drunken granny stitch to create an open, drapey fabric that’s ideal for layering through spring, summer and early autumn. Better still, if you can chain and double crochet, this is a very approachable stitch pattern to master.
Elegant Cocoon Cardigan – Free Crochet Pattern
With the Abbie, Highland Neamh and Elegant Cocoon Cardigans, you have three very different looks to choose from – and three opportunities to discover just how achievable crocheting your own garments can be. Once you’ve made one cocoon cardigan, don’t be surprised if another finds its way onto your hook!
Frequently Asked Questions About the Abbie Crochet Cardigan
Is the Abbie Crochet Cardigan suitable for beginners?
Yes. The Abbie is designed to be an approachable first crochet garment for crocheters who already understand the basic crochet stitches.
The simple cocoon construction means you can experience making and assembling a wearable garment without needing to master complicated shaping first.
Is this crochet cardigan pattern really free?
Yes!
The complete Abbie Crochet Cardigan pattern is free to view on the Sunflower Cottage Crochet blog.
If you prefer an ad-free printable copy, the PDF version is also available to purchase from my shops.
What is a cocoon cardigan?
A cocoon cardigan is a relaxed style of cardigan that is constructed differently from a traditional fitted cardigan.
The Abbie starts with a large crocheted rectangle that is then folded and seamed to create the cardigan shape and armholes.
It is simple, clever and particularly useful if you are dipping your toe into crochet garment making for the first time.
Can I use a different yarn for my Abbie Cardigan?
Yes, you can substitute another yarn, but I recommend choosing a similar #4 weight / aran yarn and always making a gauge swatch before committing to the whole cardigan.
Different fibres can produce very different drape and stretch even when the yarn labels suggest they are the same weight.
Can I make the Abbie Cardigan longer?
If you alter the dimensions of your cardigan, remember that you will need to adjust your yarn requirements too.
How do I choose which size crochet cardigan to make?
Use the sizing and finished measurements given above rather than relying solely on your usual shop-bought clothing size.
Consider the amount of ease you would like and how relaxed you want your finished cardigan to feel.
Do I need to block my crochet cardigan?
I recommend blocking most crochet garments because it helps the stitches settle, can improve the drape and gives your finished cardigan a more polished appearance.
However, cocoon cardigans I have found do not really require blocking at all!
Ready to Crochet Your Abbie Cardigan?
If you’ve been waiting for a sign that you’re ready to make your first crochet garment, perhaps the Abbie Cocoon Cardigan is it.
You don’t need years of experience or a collection of complicated garment-making techniques.
You need the basic crochet stitches, some yarn, your hook and a willingness to work through the pattern one section at a time.
Before long, that large rectangle on your lap will become something you can actually put on and proudly say:
“I made this.”
And that is a pretty fabulous feeling.
If you make the Abbie Crochet Cardigan, I would love to see your version. Tag Sunflower Cottage Crochet when you share your finished cardigan so I can admire it too!
Happy crocheting!
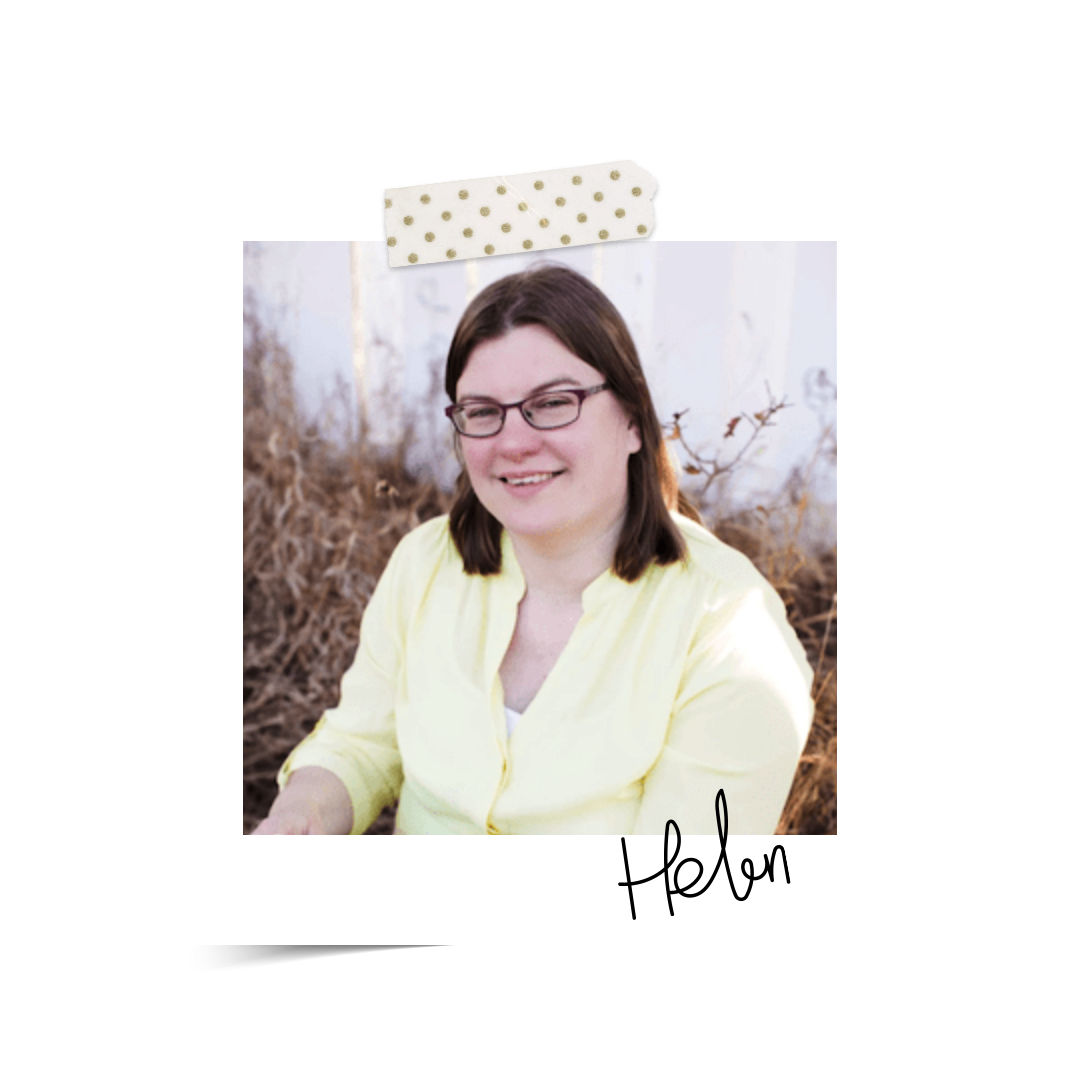
Hi! I’m Helen
I live on the north-east coast of England, UK. I am a mum and wife and enjoy reading and quilting. I started crocheting at 14 years old.
Sunflower Cottage Crochet is dedicated to empowering crocheters of all levels. I provide modern, easy-to-follow crochet patterns and video tutorials that make learning new techniques simple and accessible. My mission is to empower crocheters in their creativity, enabling them to confidently create beautiful projects no matter where they’re at in their journey. Whether it's a beginner seeking out the basics or an experienced enthusiast looking to level up their skills. My vision is for every user to experience the joy of mastering creative expression through crochet!


